The 5 Tastes Table

#foodblogchef

  • Home
  • About
  • Spices
  • Recipes Index
  • Contact Us

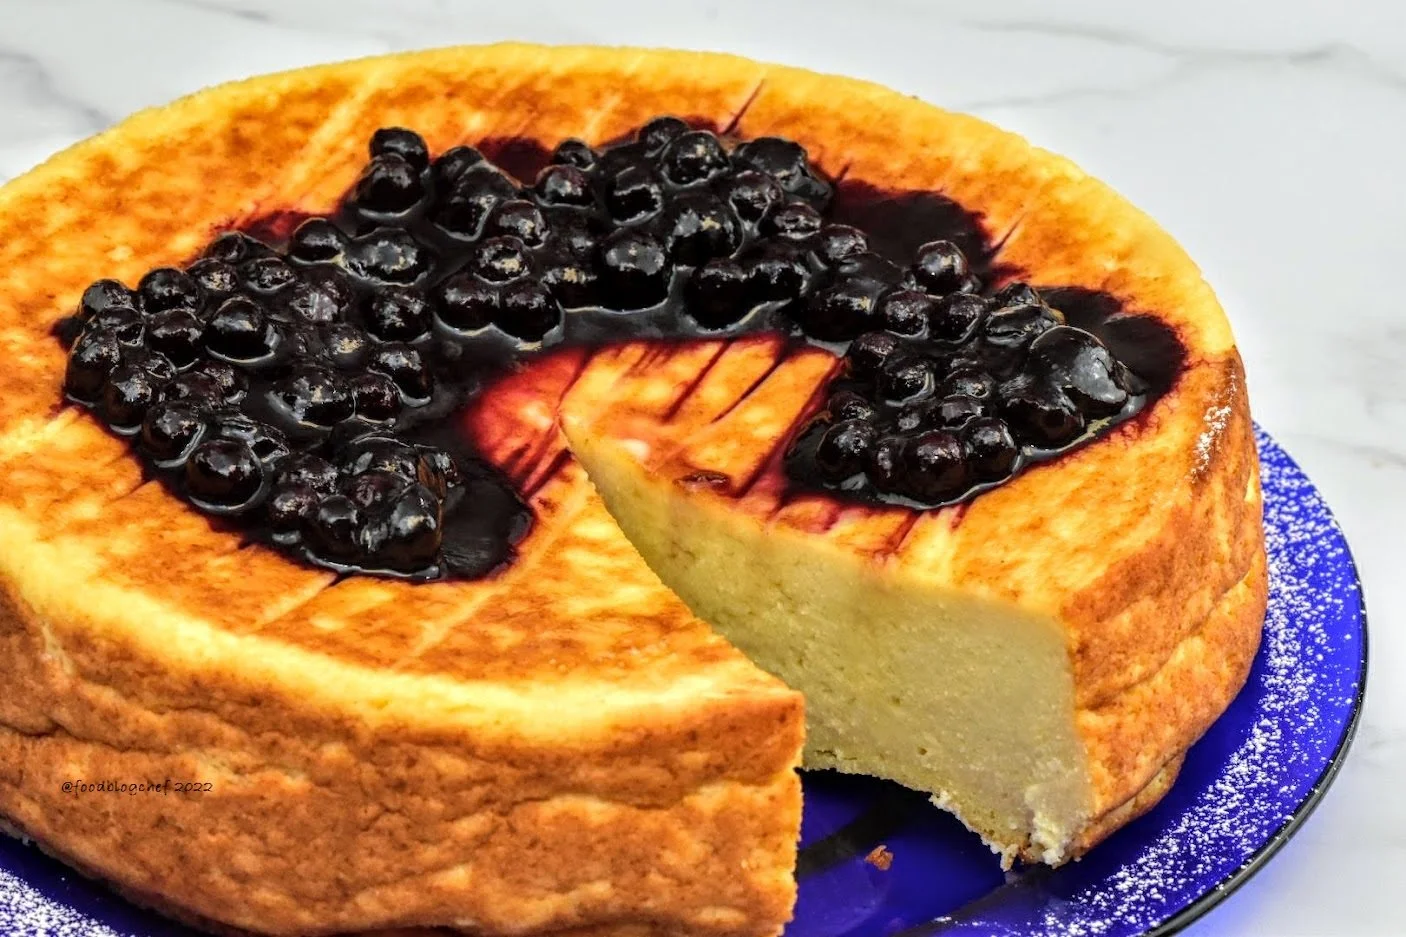
Semolina Ricotta Cake →

November 15, 2022 by FoodBlogChef in Desserts

Another classic Italian dish in the tradition of “cucina povera” is Migliaccio, or Semolina Ricotta Cake. Traditionally served around Carnevale (about 40 days before Easter), Migliaccio dates to Medieval times in Naples where it was made with millet bread (pane di miglio) and pork blood. Fast forward a few centuries and millet bread and pork blood have been replaced by easier-to-find (more compatible with the modern palate) semolina flour, eggs, milk, and ricotta cheese. Simple and easy to make, flavored with citrus and vanilla, the light texture of Migliaccio has been described as something between a traditional cake and a custard. You might even call this cake “Italian Cheesecake”. Whatever you call it, it is delicious! Although it is traditionally served in Italy during Carnevale celebrations, Migliaccio would also make an excellent alternative or side to the traditional pumpkin pie served at Thanksgiving dinner here in the United States. Whenever you choose to enjoy it, buon appetito!

Semolina Ricotta Cake (Migliaccio)
Serves 6-8

INGREDIENTS

  • 1 cup + 1 tablespoon Semolina flour

  • 4 ¼ cups whole milk (alternatively use 2 1/4 cups water + 2 cups whole milk)

  • 1 ¼ cup sugar

  • 1 ½ cups whole milk ricotta cheese

  • 4 medium eggs

  • 3 tablespoons butter (preferably unsalted)

  • 1 orange peel-zest only, no white pith

  • 1 lemon peel-zest only, no white pith

  • 2 teaspoons vanilla extract

  • 3 tablespoons limoncello

  • 1 pinch of fine salt 

PREPARATION
Preheat your oven to 355F. 

  1. To prepare the Migliaccio, first cook the semolina. Combine milk (or milk and water), salt, and butter in a saucepan, then add the orange and lemon zests and heat, stirring occasionally to melt the butter. Bring to a boil, then remove the orange and lemon zests and pour in the semolina, stirring continuously with a whisk. Lower the heat and simmer for about 4-5 minutes, the time it takes for the mixture to thicken and it begins to separate from the walls of the pan. Transfer to a dish to cool. Once it cools for a few minutes, the semolina will have a slightly rubbery consistency.

  2. Strain any extra liquid from the ricotta to make it soft and creamy.

  3. Using an electric hand mixer on medium, combine the eggs and sugar in a bowl and whisk the ingredients together until the mixture is pale and smooth.

  4. Gradually add the ricotta, vanilla extract, and limoncello followed by the semolina mixture, continuing to mix with the electric mixer. You should get an even mixture that’s well-blended without any lumps.

  5. Butter a 9-inch springform or cake pan, line the bottom with parchment paper, then pour in the mixture and level the surface with a spatula. Bake in a conventional oven preheated to 355°F for about 60-65 minutes. The cake is done when only the center of the cake is a bit jiggly or springy when touched and the top lightly browned.

  6. Before cutting and serving, allow it to cool in the pan. Once cooled, release it from the springform pan and dust the surface with powdered sugar or top with a fruit sauce to taste. 

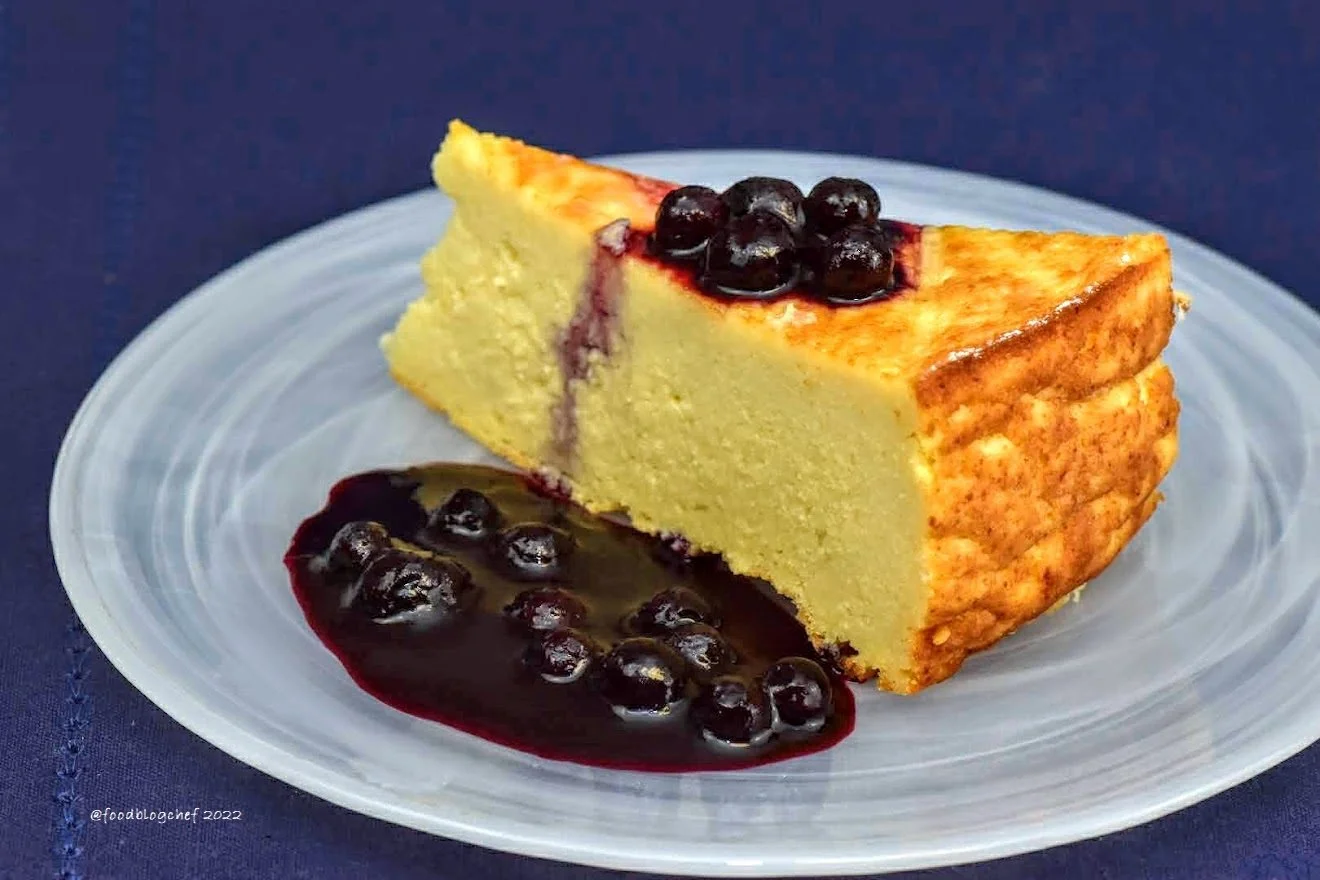
Here’s the link for the Blueberry Sauce.
The Migliaccio can be kept in the fridge for 3-4 days. Not suitable for freezing.

https://www.giallozafferano.com/recipes/Migliaccio-semolina-and-ricotta-cake.html https://grancaffegambrinus.com/en/the-migliaccio-sweet-of-the-neapolitan-tradition/

Print Recipe
November 15, 2022 /FoodBlogChef
semolina, lemon zest, orange zest, vanilla extract, ricotta, milk, butter, salt
Desserts
1 Comment

Limoncello Almond Ricotta Cake →

November 11, 2022 by FoodBlogChef in Desserts

I love all things lemon! Here’s a moist, delicious, lemony cake based on Migliaccio the Semolina Ricotta Cake typically served in Italian households to celebrate Easter and Carnevale. This is an excellent gluten-free alternative Ricotta Cake and one worth considering as an alternative to or alongside the traditional pumpkin pie often served on Thanksgiving here in the U.S. Whatever the celebration if you love lemon flavor as I do, you should give this recipe a try. Buon appetito!

LIMONCELLO & RICOTTA ALMOND CAKE
Yield: 6 to 8

INGREDIENTS:

  • 1 stick unsalted butter, softened

  • 1 1/3 cups sugar

  • 1 cup full-fat ricotta

  • 1 teaspoon vanilla

  • finely grated zest from 1 lemon washed (a fine Microplane is useful here)

  • 3 eggs, room temperature, separated, whites and yokes reserved

  • 3 tablespoons Limoncello (home made or store-bought)

  • 2 1/2 cups almond flour

  • 1 teaspoon baking powder

  • 1/3 cup sliced almonds

  • Powdered sugar, for dusting 

DIRECTIONS:

  1. Preheat oven to 320 F degrees. Butter a 9-inch springform pan. Line the bottom of the pan with parchment paper.

  2. Using an electric mixer, beat the butter and sugar together until incorporated. Mix in the ricotta, vanilla, and lemon zest.

  3. Scrape down the sides of the bowl, then add the egg yolks, one at a time, continuing to beat until very light and creamy. Add in the limoncello, almond flour, and baking powder and beat to combine.

  4. In a separate clean chilled bowl, beat the egg whites with an electric mixer until stiff peaks form. Gently fold the egg whites into the cake mixture. (Don’t worry if white streaks remain – they will disappear once in the oven.)

  5. Pour the mixture into the prepared springform pan. Smooth the top with a spatula or spoon. Sprinkle with the sliced almonds. Bake for 40-45 minutes or until firm yet jiggly and slightly springy to the touch.

  6. Allow to cool completely before removing from the pan. (It will fall slightly.) Dust with powdered sugar and serve!

 Adapted from: https://eatalianrecipes.com/grandmas-limoncello-ricotta-almond-cake/

Print Recipe
November 11, 2022 /FoodBlogChef
almond flour, sliced almonds, eggs, butter, lemon zest, sugar, baking powder, salt, ricotta, powdered sugar
Desserts
Comment
Photo: c. foodblogchef 2020

Photo: c. foodblogchef 2020

The Perfect Flan →

December 23, 2020 by FoodBlogChef in Desserts

This recipe appeared in a 1992 Collectors Edition of Bon Appetit focusing on Spain. There is no better flan! The only adjustment I made to the original recipe is the addition of some lemon zest to give the custard a slight lemon note. I still can’t decide which I prefer, Crème Brûlée or Flan...life should be full of such choices! Which do you prefer?

The Perfect Flan
Serves 6

Ingredients:

  • 1 ¾ cups whipping cream

  • 1 cup whole milk (do not use low-fat or nonfat)

  • Pinch of salt

  • ½ vanilla bean split lengthwise (or 2 teaspoons vanilla extract)

  • 2-3 teaspoons finely grated lemon zest (optional)

  • 1 cup sugar

  • 1/3 cup water

  • 3 large eggs

  • 2 large yolks

  • 7 tablespoons sugar

Preparation:
Position the rack in the center of the oven and preheat to 350°F.

  1. Combine cream, milk, and salt in a heavy medium saucepan. Add the vanilla: scrape the seeds from the vanilla bean into the cream mixture and add the bean; alternatively, add the vanilla extract. Bring to a simmer over medium heat. Remove from heat and let steep for about 30 minutes.

  2. Meanwhile, combine 1 cup of sugar and 1/3 cup of water in another heavy medium saucepan. Stir over low heat until the sugar dissolves. Increase heat to medium-high and cook without stirring for about 10 minutes brushing down the sides of the pan with a wet pastry brush and swirling the pan occasionally until the boiling syrup just begins to turn a deep amber. Be careful not to overcook or the caramel will taste burnt. Quickly pour the caramel into six 3/4-cup ramekins or custard cups covering the bottom of each ramekin. Set the ramekins into a 13x9x2-inch baking pan with an inch of hot water in the bottom. (This will help keep the caramel from setting up too quickly.)

  3. Whisk the eggs, egg yolks, and 7 tablespoons sugar in a medium bowl just until blended. Gradually and gently whisk the cream mixture into the egg mixture without creating lots of foam. Pour the custard through a small mesh sieve into a 4 cup measuring cup and then pour, dividing evenly, into the ramekins. Pour enough hot water into the baking pan to come halfway up the sides of the ramekins.

  4. Bake until the centers of the flans are gently set, about 30 minutes. Check the flans after 30 minutes and shake the baking pan. The flans are done when the center of the flan barely moves when you shake the baking pan. Transfer the flans to a rack and cool. Chill until cold, about 2 hours. Cover with tin foil or plastic wrap and chill overnight. (Can be made 2 days ahead.)

  5. To serve, run a small sharp knife around the flan to loosen. Turn over onto a small plate. Shake gently and tap the bottom to release the flan. Carefully lift off the ramekin allowing the caramel syrup to run over the flan. Repeat with the remaining flans and serve.

https://www.epicurious.com/recipes/food/views/the-perfect-flan-1902

Print Recipe
December 23, 2020 /FoodBlogChef
effs, sugar, whipping cream, whole milk, salt, lemon zest, vanilla
Desserts
Comment

Instagram Facebook Pinterest

Powered by Squarespace